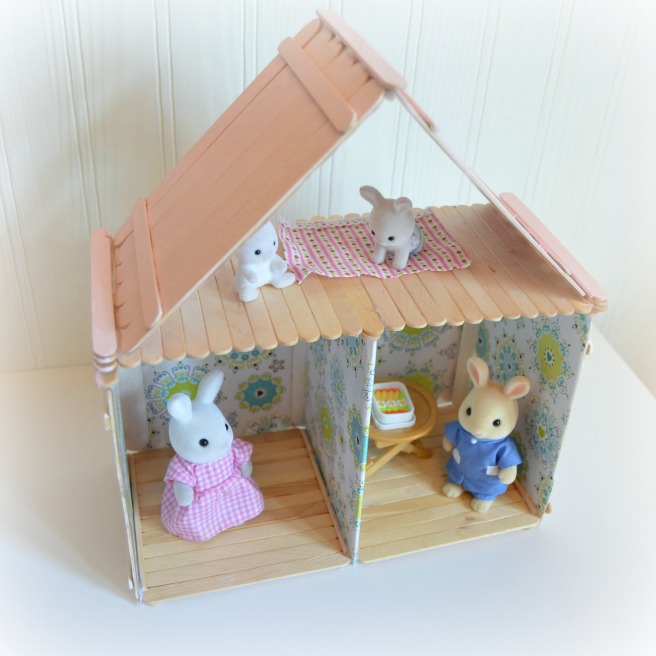
This weekend I was feeling very thankful for Calico Critters. My girls actually played with them for hours. They were having so much fun that I was hesitant to disrupt them for outside time in fear that I would break the magic get along spell. The one thing my oldest really wanted though was more buildings. Of course, anyone who’s bought these toys before knows that the critters are expensive enough but the buildings are definitely not something you buy on a whim because of a weekend worth of extensive play. Don’t get me wrong, they’re gorgeous and well made, I love them. But unless there’s a birthday around the corner my kids are going to have to make do. So instead, we came up with this alternative using, as usual, things from the craft cupboard. 🙂
This is a very simple design, you could go crazy and be elaborate if you like but I decided to keep it simple. All my daughters requested was that the front be open so they could access it easily, sounds good to me.
For this craft you’ll need a bunch of craft popsicle sticks (I used two different sizes but you could do it with just the basic ones, the walls will just be a little shorter), a glue gun or some strong glue, some kind of wallpaper (I used wrapping paper because that’s what I had but you could use scrapbook paper or just leave them paperless if you like), paint (I used acrylic) a paintbrush or sponge, scissors and I think that’s about it…
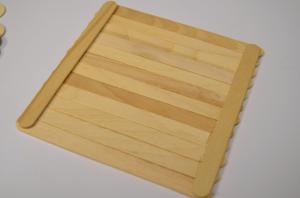
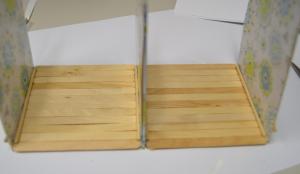
So first you need to make these little squares out of the regular sticks. I didn’t glue each stick together, just held them tight and glued the side sticks on to them. These will be the floors and you’ll need 4 of them.
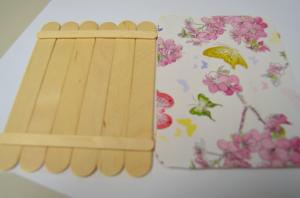
Next I made these slightly bigger rectangles, the same way. These will be the walls and the roof. You’ll need 7 of them.

For 4 of the wall slabs, I glued paper onto one side and painted the other side white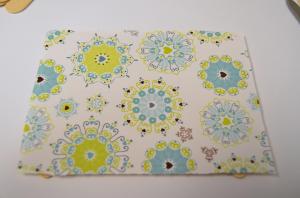

Glue one of the outside walls to one of the floor pieces like so. This is where hot glue is nice because it dries quickly so I really just needed to hold it there for a few seconds.
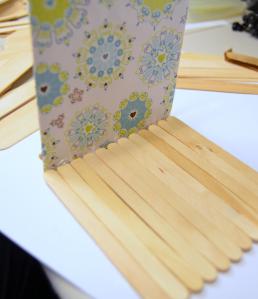
For one of the wall pieces, I covered both sides with paper and then glued it in between the two bottom floor pieces.
I then glued the other outside wall to the other side.
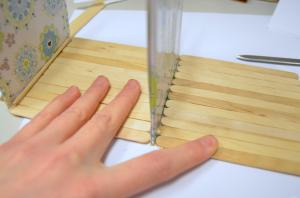
To make the top floor, I took the two remaining floor pieces and stuck an extra stick in between them to make the floor a bit wider. Then to secure it I glued another stick across the middle. I then glued the whole slab to the top of the structure to act as the 2nd level floor.

I glued three sticks to the back of the walls to make gluing the back walls on a bit easier.

For the two back walls, I glued paper to one side and painted the other side white. I then glued it to the back of the bottom floor.

For the roof I glued paper to one side of each of the two pieces.
I glued two sticks to the top of each end of the second floor to help keep the roof in place, and one stick on top of the roof.

Let her dry and there she is!